
Quick Summary
To create a professional gallery wall, start with the largest piece as an anchor and lay out the arrangement on the floor first. Keep spacing consistent at 2 to 3 inches between frames, and hang the center of the grouping at roughly 57 to 60 inches from the floor.
- Choose the largest artwork as the anchor that sets scale for the whole wall.
- Make the grouping about two-thirds to three-quarters the width of the furniture beneath it.
- Use paper templates taped to the wall to test the layout before drilling any holes.
- Keep frame gaps at 2 inches for small frames and 3 inches for larger ones.
- Match the hanging hardware to the wall type, using toggle bolts for heavy pieces on drywall.
Table of Contents
- Start With the Largest Piece as Your Anchor
- Choose a Wall That Suits the Display
- Plan the Gallery Wall Layout on the Floor First
- Use Paper Templates to Test Your Layout Before Hanging
- Keep Gallery Wall Spacing Consistent at 2-3 Inches
- How to Hang a Gallery Wall at Eye Level
- Pick Your Next Anchor Piece and Start Your Gallery Wall
- Frequently Asked Questions
Start With the Largest Piece as Your Anchor
A professional gallery wall starts with one decision: which piece leads. Choose the largest artwork in your collection and build the arrangement around it. Smaller pieces then fill the space around that focal point.
Designers often describe the largest piece as the anchor. It sets the scale and tone for everything else on the wall. Without it, a wall of medium-sized frames can look scattered rather than intentional.
Pick an anchor that suits the room. Choose an anchor sized to the wall it will hang on.
Choose a Wall That Suits the Display
Wall choice shapes the final look more than most people expect. Measure the wall before you buy a single frame. Note its width, height, and any obstacles such as outlets, windows, or doorways.
Consider what sits below the wall, too. A sofa, console, or bed should anchor the arrangement without blocking it. A gallery wall usually reads best when its width roughly matches the furniture beneath it.
Light matters as well. Watch how natural light moves across the wall during the day. Glare on glass fronts can hide artwork, so avoid placing framed pieces directly across from a window that catches harsh afternoon sun.
Plan the Gallery Wall Layout on the Floor First
Lay everything out on the floor before you touch the wall. Arrange the frames in the pattern you want, and step back to check the overall shape. Adjust until the composition feels balanced. This step saves time and nail holes: moving a frame on the floor takes seconds, while moving one on the wall means patching drywall and hanging again.
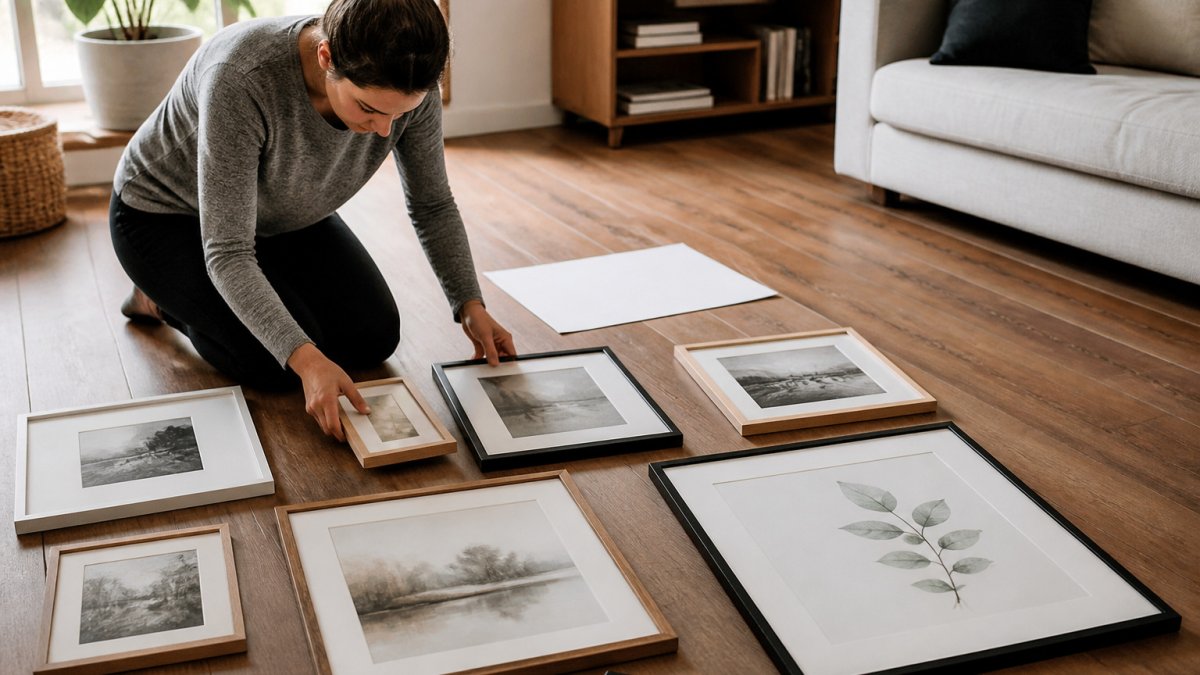
Size the Layout to the Wall and Furniture
A gallery wall reads as intentional when its footprint relates to what sits below it. A common rule is to make the arrangement about two-thirds to three-quarters the width of the sofa, console, or bed beneath it. For a standard 84-inch sofa, that means a grouping roughly 56 to 63 inches wide. Leave at least 6 to 8 inches of breathing room between the bottom frame and the furniture top so the art does not crowd the surface.
For a wall on its own, keep the outer edges at least 6 to 12 inches from corners, door casings, and ceiling lines. On a 10-foot wall (120 inches), a 60- to 72-inch-wide grouping leaves comfortable margins on both sides.
Pick a Layout Pattern That Fits Your Wall Width
Most professional-looking walls follow one of a few patterns. Match the pattern to the wall's proportions rather than forcing a favorite shape.
- Grid (salon-style rows): Best for a wide wall above a sofa or a long hallway. Use same-size frames in even rows, with 2 to 3 inches between frames. A 3-by-3 grid of 16x20 frames with 2-inch gaps spans about 56 inches wide and 64 inches tall.
- Symmetrical center-out: Place the anchor in the middle and mirror pieces on each side. Works well on narrow walls and above a bed, where a centered composition feels calm.
- Asymmetrical balance: Mix sizes and orientations, but keep visual weight even. A large piece on one side can be balanced by a cluster of two or three smaller frames on the other.
- Salon wall (floor-to-ceiling): Fills tall walls and stairwells. Start from the center and work outward, keeping gaps consistent and edges roughly aligned to an invisible rectangle.
Use Paper Templates and a Spacing Formula
Cut paper templates for each frame, tape them to the wall with painter's tape, and step back to judge the arrangement at true scale. Templates let you shift pieces without leaving marks and make it easy to mark exact nail positions through the paper.
To place the first hole accurately, measure the frame's hanging wire or D-ring height, then subtract that distance from the frame's top edge. Mark that point on the template. For a frame with a wire, pull the wire taut and measure from the top of the frame to the wire's peak; that is the offset for the hook.
Keep gaps consistent. A 2- to 3-inch gap is the usual standard, but the gap should scale with frame size: 2 inches for frames under 16 inches, 3 inches for larger pieces. Use the same gap throughout so the arrangement reads as one unit.
The article gives these sizing and spacing figures for planning a gallery wall layout.
| Item | Value | Note |
|---|---|---|
| Grouping width vs. furniture | 2/3 to 3/4 of furniture width | Standard rule for the arrangement |
| Gap above furniture | 6 to 8 inches | Between bottom frame and furniture top |
| Wall edge clearance | 6 to 12 inches | From corners, casings, ceiling |
| Frame spacing under 16 in. | 2 inches | Gap for smaller frames |
| Frame spacing 16 in. and up | 3 inches | Gap for larger frames |
| Eye-level center | 57 to 60 inches | From floor to grouping center |
Use Paper Templates to Test Your Layout Before Hanging
If the floor layout feels hard to visualize on the wall, cut paper templates. Trace each frame's outline onto kraft paper or newsprint, cut them out, and tape them to the wall with painter's tape.
Templates let you see the full arrangement at true scale. They also make it easy to shift pieces without leaving marks. Once the layout works, measure and mark the exact nail positions through the paper.
A common mistake is skipping this step and hanging frames based on how they looked on the floor. Walls and floors create different perspectives, so the templates close that gap.
Keep Gallery Wall Spacing Consistent at 2-3 Inches
Consistent spacing is what makes a gallery wall look professional. Many designers recommend keeping about 2 to 3 inches between frames. Use the same gap throughout so the arrangement reads as one unit.
Measure the spacing with a tape measure rather than guessing by eye. Small inconsistencies become obvious once the frames are on the wall. A ruler or level helps keep rows and columns aligned.
Spacing can shift slightly for oversized pieces, but the rhythm should stay steady. Uneven gaps are one of the quickest ways to make a wall look accidental.
How to Hang a Gallery Wall at Eye Level
Hang the arrangement so the center of the group sits at roughly eye level, which is usually around 57 to 60 inches from the floor. Measure from the floor to the center point of the entire grouping, not to the top of each frame. In rooms with very high ceilings, some designers raise the center to 60 to 64 inches so the art relates to standing sightlines rather than seated ones.
Work from the anchor piece outward. Hang the largest frame first, then place the rest around it according to your template. Check each frame with a level before moving on. A 24-inch spirit level is enough for most frames; for a long row, use a 48-inch level or a laser level to keep the tops aligned.
Match the Hardware to the Wall
The right fastener depends on what the wall is made of, not just how heavy the frame is. Most picture-hanging failures come from using the wrong anchor for the substrate.
- Drywall (gypsum board): Light frames under about 10 pounds can hang from a hardened steel picture hook driven into the drywall. Heavier pieces need a hollow-wall anchor such as a self-drilling toggle bolt or a metal spiral anchor. Toggle bolts spread the load behind the drywall and are the usual choice for frames over 20 pounds.
- Plaster and lath: Older walls crack easily. Drill a small pilot hole, use a masonry bit if you hit the scratch coat, and prefer toggle bolts over nails. Avoid hammering directly into plaster.
- Brick and concrete: Use a masonry bit and a plastic or lead sleeve anchor, or a Tapcon-style screw. These walls hold heavy pieces well but require drilling, so plan the layout carefully before committing.
- Studs: A stud finder lets you screw directly into wood framing for the heaviest pieces. A 1x4 cleat screwed across two studs can carry a large canvas or a heavy mirror.
Renter-Friendly and Low-Damage Options
If you rent or want to avoid patching, several products remove cleanly. Several hanging methods can reduce wall damage. Check the weight rating on any product you choose and follow its instructions for curing and removal.
Pick Your Next Anchor Piece and Start Your Gallery Wall
Ready to build your own display? Start with a single large piece that suits your room, then add supporting works around it. Summer Somewhere is an original acrylic on canvas gallery wrap that can serve as a centerpiece for a gallery wall. The Clift lighthouse is an original acrylic on canvas gallery wrap with a coastal theme. Wild Waters is an original 24"x36" acrylic on 98lb paper with a nature theme.


Frequently Asked Questions
How do you make a gallery wall look professional?
A professional-looking gallery wall starts with one large anchor piece, a shared frame style or color palette, and consistent spacing of about 2-3 inches between frames. Mix sizes and orientations so the arrangement feels collected rather than matched. Lay everything out on the floor first, then move pieces until the group reads as one balanced shape. Keep the overall grouping centered at eye level so the display looks intentional when you step back from the wall.
How do you plan a gallery wall layout before hanging anything?
Measure the wall and mark its center, then decide the overall footprint the grouping should occupy. Lay the artwork on the floor inside that footprint and rearrange until the composition balances. Trace each piece onto paper templates, tape them to the wall, and step back to check the spacing and height before driving any nails. Photographing the floor layout helps you compare options without moving the pieces again.
What is the ideal spacing between pictures in a gallery wall?
Most design guides recommend keeping gaps between frames consistent, typically 2-3 inches. Consistent spacing is what makes a grouping look planned, even when the frames vary in size. Use the same measurement between every pair of frames, including diagonal neighbors, and avoid letting one gap grow wider than the rest. Adjust the spacing only after the full arrangement is set, so one change does not throw off the whole layout.
Should gallery wall frames match?
Frames do not need to match exactly, but a shared element such as the same finish, color, or material helps the wall look cohesive. Varying frame widths and profiles can add a collected feel as long as the color palette stays consistent. Mixing one or two frame styles usually works better than using many unrelated ones. If the artwork itself varies widely, matching frames can unify the display.
