
Last Updated: October 25, 2026
Quick Summary
To visualize art on walls, photograph your wall straight on at eye level, upload it to an art visualizer app or browser tool, and enter the artwork's exact dimensions. Set a scale reference against a known object like a door frame or sofa, then drag and resize the piece until it sits where you want.
- Art above furniture should span roughly two-thirds to three-quarters of the furniture's width.
- Center art at roughly eye level, around 57 to 60 inches from the floor.
- Leave at least 6 to 8 inches between the art's bottom edge and the furniture top.
- Keep 2 to 3 inches between frames in any gallery wall layout.
- A door is typically 80 inches tall; an outlet is usually 12 to 16 inches off the floor.
Table of Contents
- Why Visualizing Art Before You Hang It Saves Money and Wall Damage
- Measure the Wall and the Artwork First
- How to Use an Art Visualizer App to Preview a Piece in Your Room
- Building a Wall Art Mockup with a Photo of Your Room
- Choosing the Right Art Size for Wall Space
- Gallery Wall Layout Ideas You Can Test Before You Drill
- Matching Art to the Room: Light, Color, and Frame Choice
- Common Visualization Mistakes and How to Fix Them
- Frequently Asked Questions
Why Visualizing Art Before You Hang It Saves Money and Wall Damage
Every nail hole is a small commitment. Make enough in the wrong spots and you're patching drywall and repainting.
The core problem: scale is deceiving. A canvas that looks generous on a screen can look like a postage stamp on a wide living room wall, and a piece you love in a photo can fight your paint color.
At Mind-Meld Gallery, we hear the same worry from first-time buyers: "How do I know it'll look right in my space?" That's exactly what a preview solves.
Measure the Wall and the Artwork First
Grab a tape measure and note the total wall width, the usable height from floor to ceiling, and any obstacles like a light switch, outlet, or thermostat that could sit behind a frame.
Now measure the piece itself. Our listings give exact dimensions, so there's no guessing:
| Artwork | Price |
|---|---|
| Clift Lighthouse | $675 |
| Summer Somewhere | $895 |
| Teacher | $1,275 |
| Summer | $2,010 |
A quick rule that saves regret: art hung above furniture should span roughly two-thirds to three-quarters of the furniture's width. Too small and the wall looks empty; too large and the room feels cramped.
How to Use an Art Visualizer App to Preview a Piece in Your Room
An art visualizer app lets you drop a piece onto a photo of your wall and see the size, placement, and color before you buy. The difference between a useful preview and a misleading one comes down to how carefully you calibrate the input.
- Photograph your wall straight on, at eye level, with the whole wall in frame.
- Upload the photo to the app or browser tool.
- Enter the artwork's exact dimensions, not a guess. Use the listed size, such as 24" x 24" for Summer Somewhere or 24" x 36" for Summer.
- Set a scale reference. Tap two points on a known object (a door frame, a sofa back, a standard 30-inch outlet height) and enter that real-world distance. This step makes or breaks accuracy.
- Drag, resize, and rotate the piece until it sits where you want. Lock the aspect ratio so the artwork does not stretch.
- Export a high-resolution image to share with a partner or roommate.
The step-by-step comparison below shows what each method does well and where it breaks down.
Phone Apps vs. Browser Tools vs. Paper Templates
Phone apps are fast for a rough check, but small screens make fine spacing hard to judge. Browser tools handle larger files, export more cleanly, and are easier to share.
| Method | Setup Time | Accuracy | Best For | Main Limitation |
|---|---|---|---|---|
| Phone app | 2-5 minutes | Medium, depends on scale reference | Quick size checks, single pieces | Small screen, rough scale, glare on phone |
| Browser tool | 5-15 minutes | High, if photo is straight and scale is set | Detailed mockups, gallery walls, sharing | Needs a good room photo and a known reference |
| Paper template | 10-20 minutes | High for footprint, low for color | Zero-cost, no tech, feeling the real size | No color or frame preview, tape can damage paint |
Paper wins on one thing apps can't match: you can stand back and feel the actual footprint. Many people tape up a template, live with it a day, and change their mind.
When you're ready to try a real piece in your space, shop Summer Somewhere and use its 24" x 24" size as your test case. Enter the exact dimensions into the app, set a scale reference against your sofa or door frame, and compare the preview to a paper template taped to the wall. If the two agree, you have a layout you can trust.

Building a Wall Art Mockup with a Photo of Your Room
A wall art mockup is only as good as the photo underneath it. A crooked, dim shot will make any piece look wrong, and worse, make a wrong layout look right.
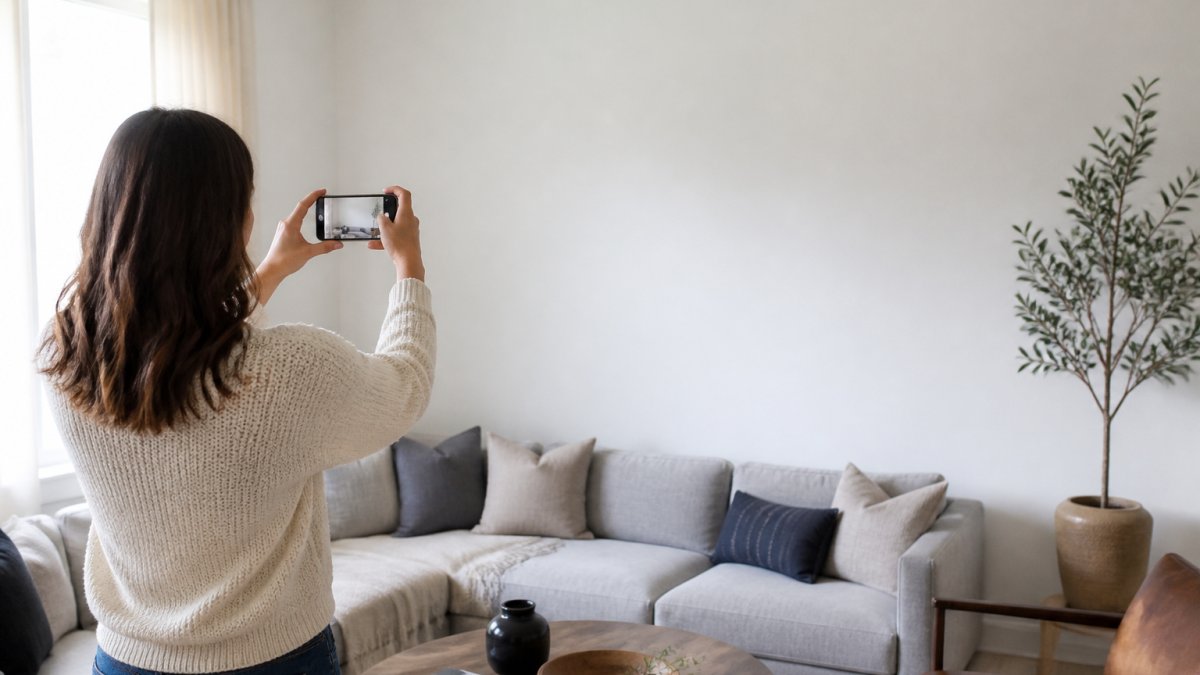
Getting the Photo Right: Light, Angle, and Scale
Follow these steps for a clean room photo:
- Stand directly in front of the wall, not off to the side. A 10-degree angle can shift a frame's apparent position by several inches.
- Hold the phone at chest or eye level, not tilted. Tilting distorts perspective, making the top of the wall look wider than the bottom.
- Turn on room lights and open curtains for even light. Avoid shooting into a bright window, it throws the wall into shadow and the preview will misjudge color.
Correcting Perspective, Scale, and Shadow in the Mockup
Even a good photo needs correction before the preview is trustworthy.
- Perspective distortion: If the wall's top and bottom edges aren't parallel in the photo, the mockup will misplace the art. Use the app's keystone correction, or reshoot with the phone level.
- Scale drift: Measure the preview against your reference object. If the sofa in the photo is 84 inches wide and the art spans more than three-quarters of it, the preview is probably scaled too large. Adjust the scale reference and re-place the piece.
- Shadow mismatch: A mockup often pastes art with no shadow, so it looks like a sticker. Add a subtle drop shadow matching the room's light direction, or leave extra visual breathing room for the real one.
A study in Procedia - Social and Behavioral Sciences found that how a piece is displayed changes how long people look at it, which is a good reminder that context matters as much as the art itself. You can read the mobile eye-tracking study on artwork display for the details.
Choosing the Right Art Size for Wall Space
The right art size depends on three things: wall width, furniture width, and viewing distance. A big wall needs a big piece, or a group of smaller ones.
Use this quick checklist:
- Measure the wall's clear width, ignoring trim and doors
- Measure the main furniture piece below the art
- Aim for art that spans two-thirds to three-quarters of that furniture
For a large living room wall, a 24" x 36" piece like view the Summer canvas gives you a real dimension to test against your measurements.

If the wall still feels bare after one piece, that's your cue to plan a group.
Gallery Wall Layout Ideas You Can Test Before You Drill
Gallery wall layout ideas live or die on spacing. You can test every arrangement on the floor or in a mockup before a single hole goes in. Cut paper templates for each frame, tape them up, and try these three layouts.
Grid, Salon, and Asymmetric Layouts Compared
A grid uses matching frames in even rows, calm and orderly, suited to a hallway or office. A salon layout stacks many pieces of different sizes, filling the wall edge to edge; lively but needs careful balancing.
| Layout | Best For | Difficulty |
|---|---|---|
| Grid | Matching frames, tight spaces | Easy |
| Salon | Large feature walls | Hard |
| Asymmetric | Casual, collected look | Medium |
Keep 2 to 3 inches between frames in any layout. Consistent gaps matter more than perfect symmetry.
Planning a group means picking several pieces. Browse the Summer collection to get a candidate you can lay out on the floor first.
Matching Art to the Room: Light, Color, and Frame Choice
Art that clashes with a room usually clashes on one of three fronts: light, color, or frame. Fix those and the piece settles in.
Light first. A wall facing a bright window will wash out pale prints and make dark ones look flat.
Color next. Pull one accent from your room, like a rug or cushion, and see if the art echoes it.
Frame choice changes everything. A thin black frame reads modern; a warm wood frame softens a piece.
If you want a specific piece to judge against your room's light and colors, see the Teacher painting and test its warm amber tones against your wall.

Common Visualization Mistakes and How to Fix Them
Most preview problems come from bad inputs, not bad art.
- Wrong scale: The mockup looks off because the room photo was taken at an angle. Reshoot straight on.
- Color shift: Phone screens and room lights distort color. Compare the preview under the same light as the wall.
- Ignoring obstacles: A preview hides light switches and outlets. Check the wall in person before drilling.
A preview also can't show glare from glass or the true depth of a canvas. If the piece sits in direct sun, plan for how it will look at different times of day.
One more thing most guides miss: check that your hanging hardware suits the wall. Drywall anchors for heavier pieces, and studs where you can find them.
Frequently Asked Questions
How can I preview a painting on my wall before buying it?
Take a straight-on photo of your wall in daylight, then drop the artwork image into a free design tool or an art visualizer app at the correct scale. Measure your wall first so the preview is accurate. If a seller offers no preview tool, ask for a high-resolution image and a scaled mockup before you pay.
What is the best free app for displaying art on the wall?
Free options fall into two groups: general design tools where you paste an artwork image onto a room photo, and dedicated art visualizer apps built for wall previews. Both work well if your room photo is taken straight on and your measurements are correct. Test two or three, since the best one depends on whether you want a quick single-piece preview or a full gallery wall layout with multiple frames.
How do I choose the right art size for my wall?
Measure the wall's width and height, then aim for artwork that fills roughly 60 to 75 percent of the width above a sofa or console. For a single statement piece over furniture, the art should span about two-thirds of the furniture's width. Use a wall art mockup or paper template taped at the exact dimensions to confirm the scale before you commit to a size.
Can I use a photo of my room to visualize wall art accurately?
Yes, and it is the most reliable low-cost method. Stand directly in front of the wall, hold the phone level, and shoot in even daylight with the room lights on. Include a reference object like a sofa or door frame so scale reads correctly. A straight-on, well-lit room photo gives a far more accurate wall art mockup than an angled shot, which distorts proportions and makes sizing guesses unreliable.
Hanging art blind is a gamble, and the wall always loses. We'd rather you see the piece in your room first, then buy with confidence. Mind-Meld Gallery offers fine art prints, canvas, acrylic, and metal prints, plus print framing and a money-back guarantee. Preview your piece, check the size against your wall, and order knowing it fits. Get started with Mind-Meld Gallery and hang the right piece in the right spot the first time.
